
Hello everyone! I’d like to share my thoughts and techniques on creating voxel hairstyles. Hopefully, this will be interesting and helpful for your projects and might simplify the modeling process a bit.
What, voxel hairstyles?! Yes! I know, at first glance, it seems like there’s nothing easier than building hair for your character out of cubes. That’s true there’s nothing complicated about it, however, I’d like to share some of my tricks, just in case someone finds them useful!
I hope you’ll find this interesting!
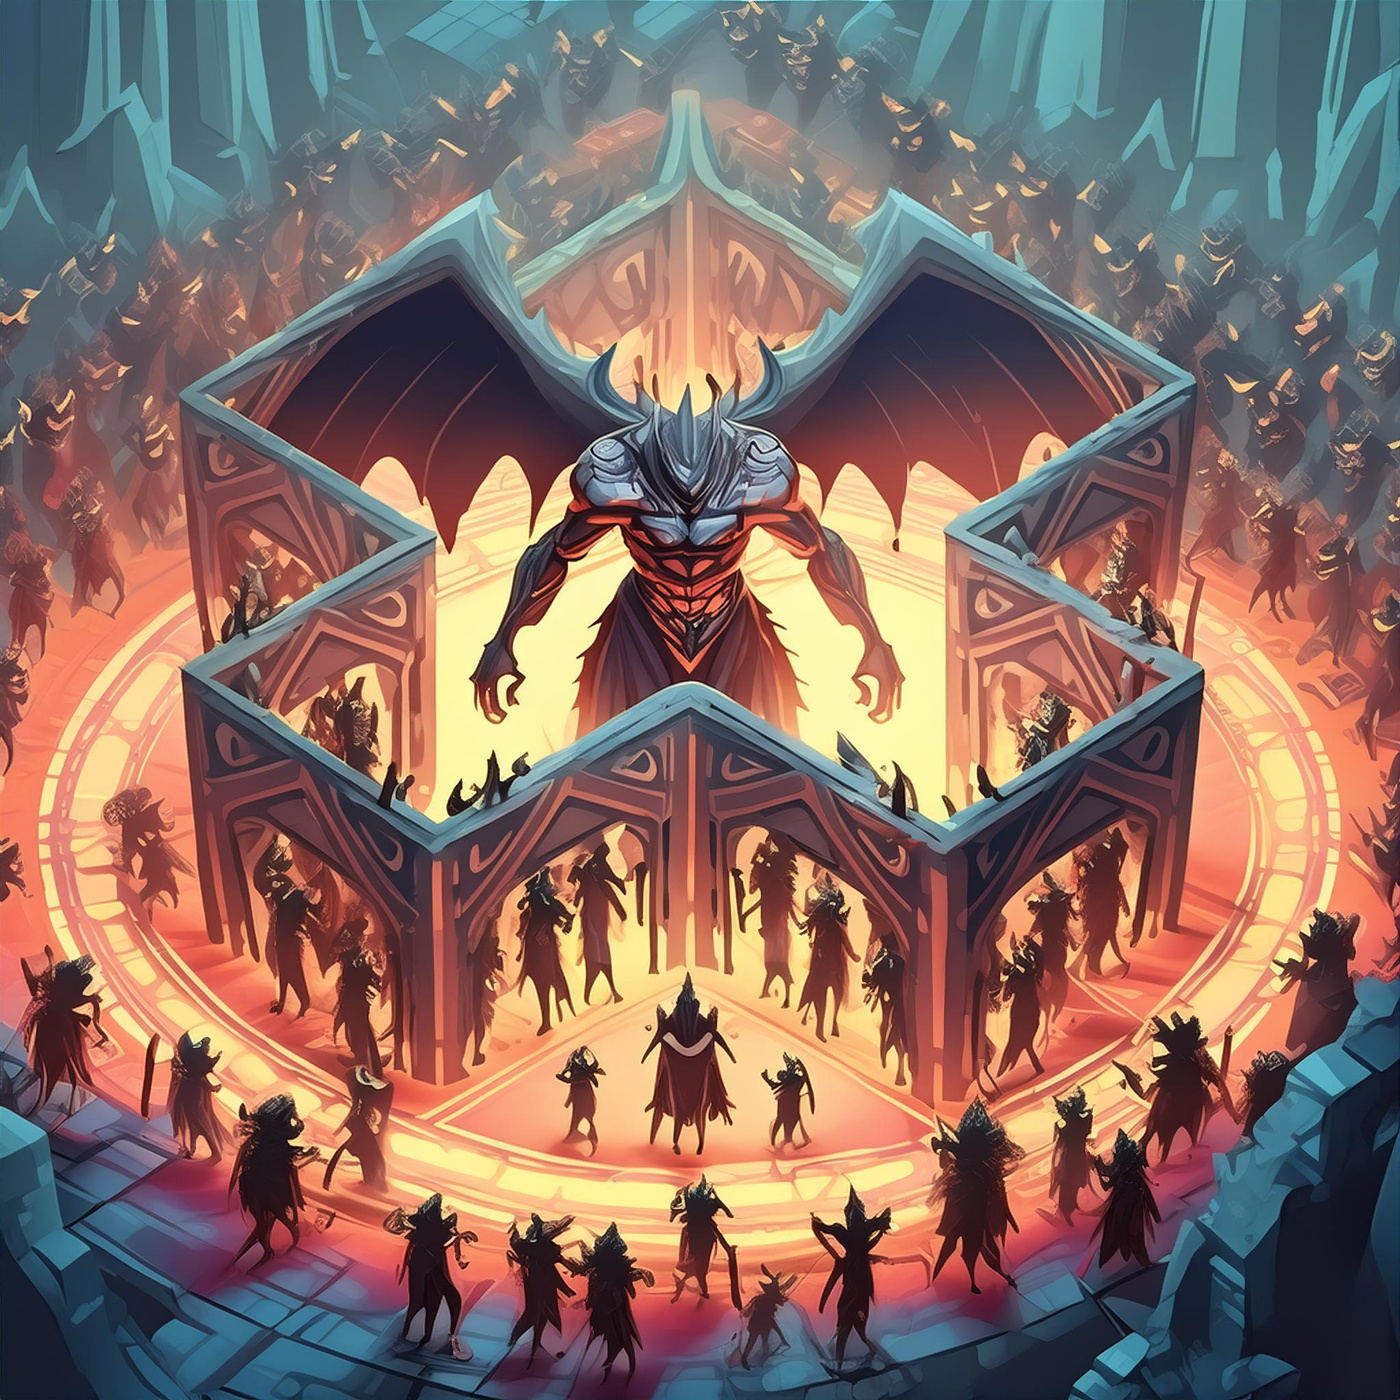
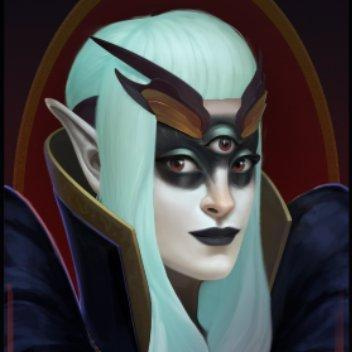
Hairstyles by Voxel Artists
I got curious about what Sandfam and Blockbench voxel artists are creating, so I gathered a few examples of different approaches that caught my eye to share in this post. Some are made by professional artists, and some by beginners. Either way, it’s interesting to take a quick look at how the voxel community tackles what seems like a simple task—voxel hairstyles!
My Experience
I’ve been working in voxel art for 5 years while being part of The Sandbox, and before that, I spent a year participating in the Creators Fund and Game Maker Fund. When modeling was my main job, I worked not only on hairstyles but also on characters, environmental objects, and much more. Style and design are my passion, and I try to reflect that passion even in something as seemingly simple as modeling hairstyles for my characters.
Optimal Pipeline – In a nutshell
To streamline the workflow, I use a simple process that helps me achieve the desired results more quickly. In this chapter, I’ll briefly outline it, and then I’ll go into more detail about each step in the rest of the post and show you examples of how these processes look in practice 😉
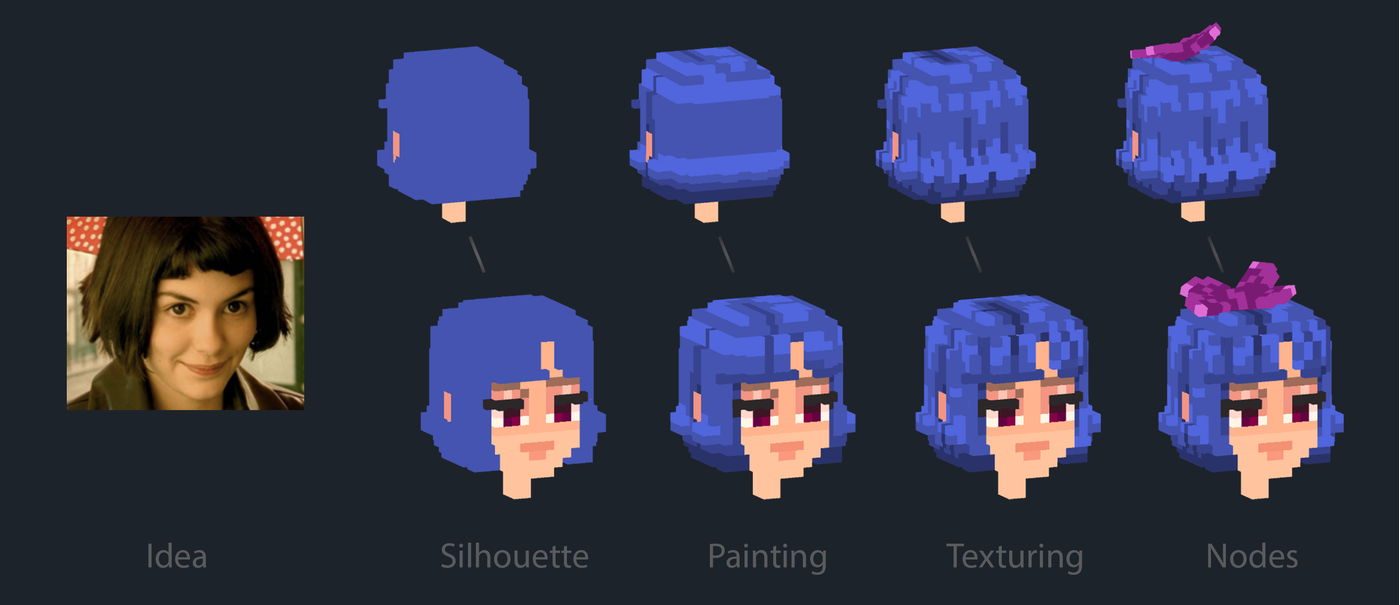
- Idea. I always start by finding an interesting idea that reflects the personality of my character. This is especially important for key NPCs and the main character. Secondary NPCs, on the other hand, shouldn’t be too unique or flashy so that the main character and quest givers stand out more prominently.
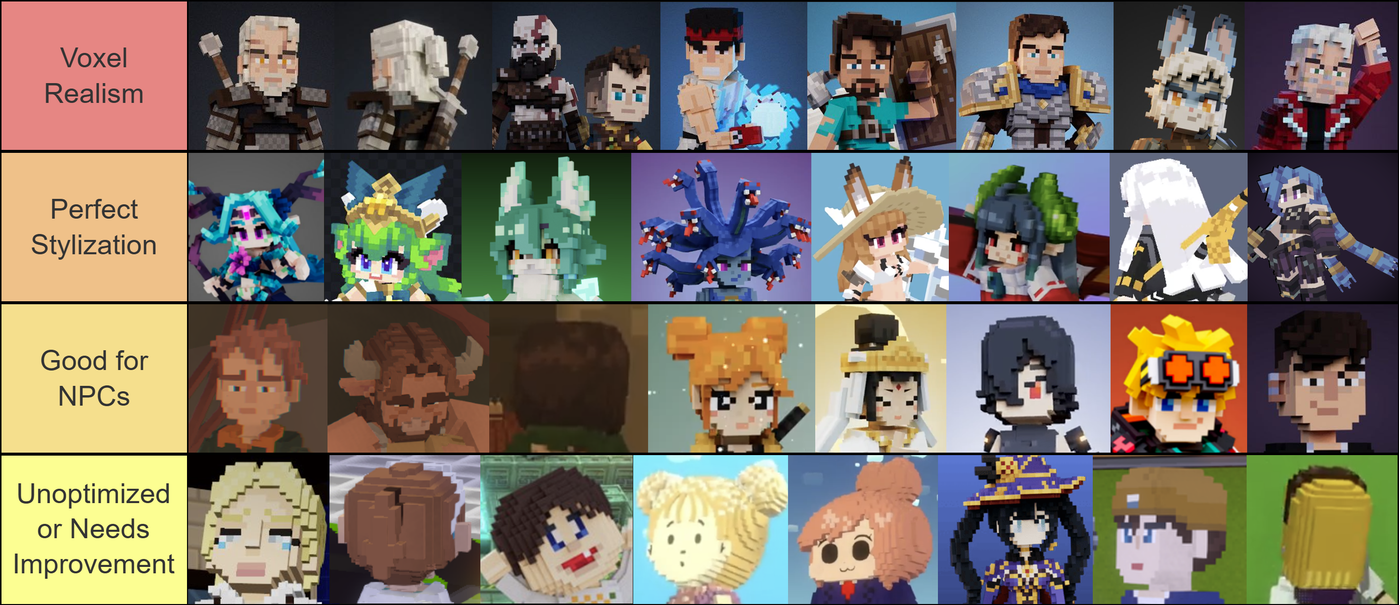
- Silhouette. I begin modeling by building the base volume on the head and focusing on finding the perfect silhouette for the hairstyle. This is the foundation that needs to be carefully refined to ensure the silhouette looks good in-game and is easily recognizable. It’s important to optimize the mesh to prevent performance issues on low-end devices.
- Painting and Texturing. Once the mesh is complete, I move on to working with colors. I use 5 shades: one for the mid-tone, and two each for highlights and shadows. Once the main tones are applied and there’s a sense of volume and handpainted lighting, I add some life to the model by adding a texture.
- Nodes and Animation. Nodes are great for creating accessories, such as hairpins etc. Nodes also can be used for more complex hairstyles, such as dreadlocks, and they can even be animated to make the hairstyle more dynamic during actions like jumping or running.
Finding the Idea
Selecting references is one of the most exciting parts of the process—it can lead me down a rabbit hole of Pinterest searches for hours! Sometimes it’s hard to stop without saving a hundred pictures that catch my eye. I just love references too much, hahaha!
To avoid getting lost in ideas, it’s better to have a clear vision of what you want to achieve before you start. When searching for references, I narrow it down to 1–5 ideas to keep my focus and avoid the temptation to mash too many concepts into one. I try to keep things simple and straightforward. Remember, your game will likely have more than one character, so you’ll need to save time wherever possible.
Limit Yourself
I'm sure you know the legendary Pareto principle aka 80/20 rule — spend 20% of the time on what gives 80% of the results. Use it to further speed up the process!
This is how I use this rule:
- I spend 20% of my time on secondary characters, keeping their designs simple and less noticeable. Simplicity is key (I avoid overly saturated colors and complex textures for minor characters).
- I spend 80% of my time on key characters and the protagonist, investing more time into making them unique and eye-catching (This way, the main character and story-critical NPCs stand out more).
This rule applies not just to their hairstyles but to their entire design and directing attention. Use 80/20 rule—where 20% of the characters should receive 80% of the attention. By focusing your time and effort on the main characters, you ensure they leave a lasting impression, while the secondary ones serve their purpose without overwhelming the scene. Balancing detail and simplicity helps guide the player's attention naturally.
The variety of hairstyles is endless, and each has its own unique shape. Believe me, even the same hairstyle can be made either highly noticeable or completely understated, depending on how you approach it.
Silhouette
Once I’ve found the concept, it’s time to model the mesh. The silhouette is the foundation of everything, and it’s better not to start working on textures until I’ve nailed the shape I want. The human brain primarily processes silhouettes during gameplay, rather than textures or small details.
When searching for the perfect silhouette, I work from the general to the specific: I start with large shapes to establish volume, then gradually add details. I often explore multiple options using layers in VoxEdit to find the ideal shape. I always keep backups of different versions, just in case something goes wrong 😅—and trust me, that happens, especially in the early stages.
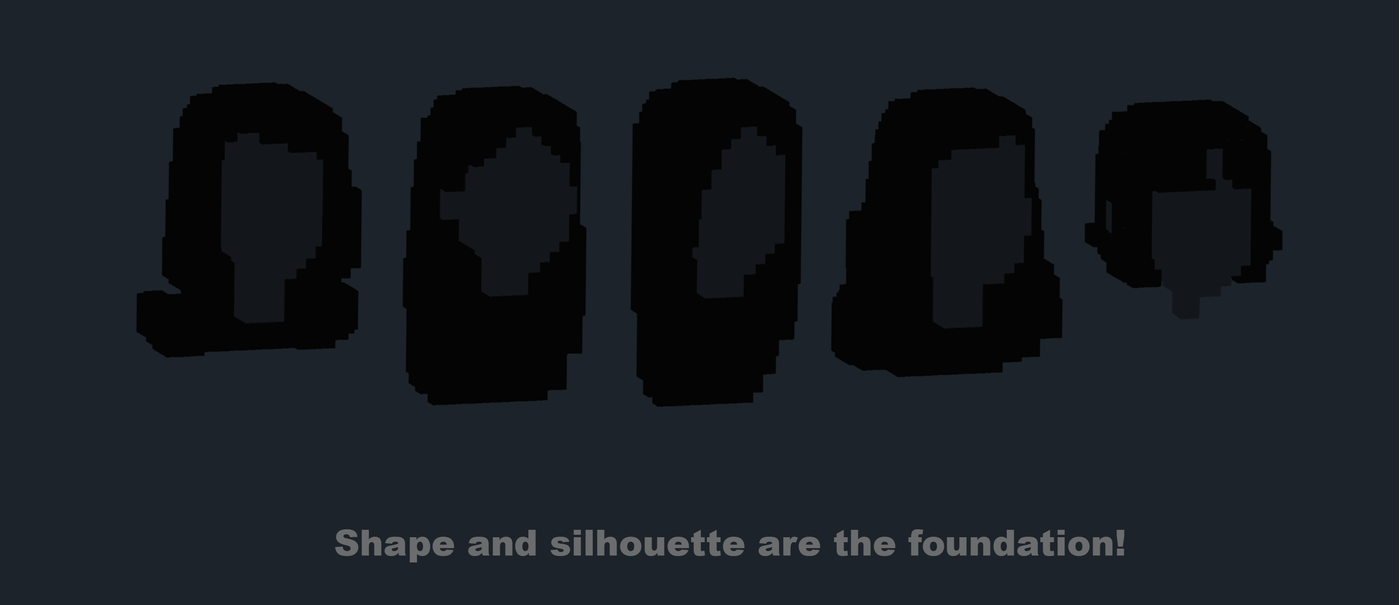
Before becoming a voxel artist, I worked as a concept artist and 3D modeler in Maya. Believe me, creating a truly cool shape with voxels is a thousand times harder than doing it in traditional 3D, because voxel art, despite its simplicity, comes with a lot of limitations. Even two extra voxels in the wrong place can ruin the sense of beauty.
Optimization
Optimization Matters. We don’t always create models just for ourselves—this is especially true for game studios—so it’s important to think about players who may not have high-end computers or phones.
Overdetailed meshes can hurt performance.
Not everyone has a powerful computer or phone. Don’t fall into the trap of obsessing over voxelization in The Sandbox, because at the end of the day, assets are converted into traditional polygons. Correct me if I’m wrong, but that’s how it works.
I feel like some creators in The Sandbox community don’t optimize their assets, which was particularly noticeable in the last few seasons. It’s understandable—there’s always the temptation to cover everything in voxels—but remember, voxelization creates challenges for graphical optimization. And it’s definitely not great when players complain about lag in your game.
To optimize my assets I use more flat surfaces and fewer voxels stairs. This reduces the polygon count in the geometry, allowing the Experience to run smoothly without lag.
Voxel stairs—they hurt performance and look noisy under lighting. Sometimes they can look good, and I do use them occasionally, but I try not to overdo it. Instead, you can add detail to an asset with clean pixel textures and good color work.
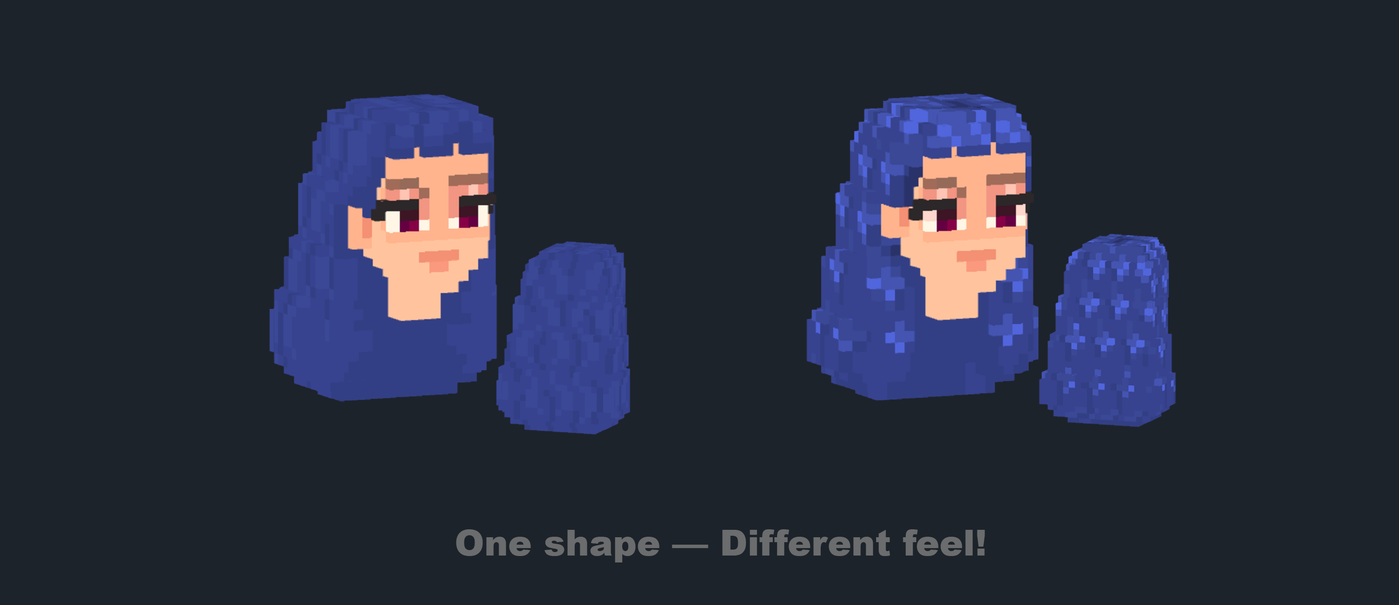
Less geometry, more texture!
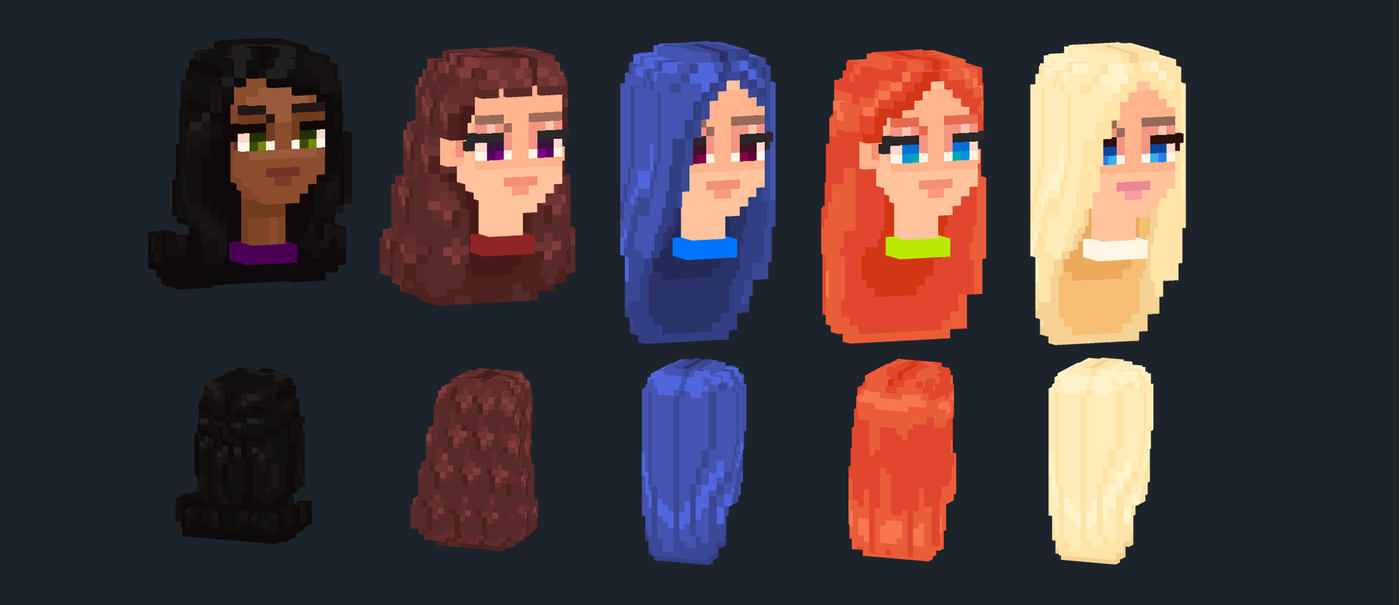
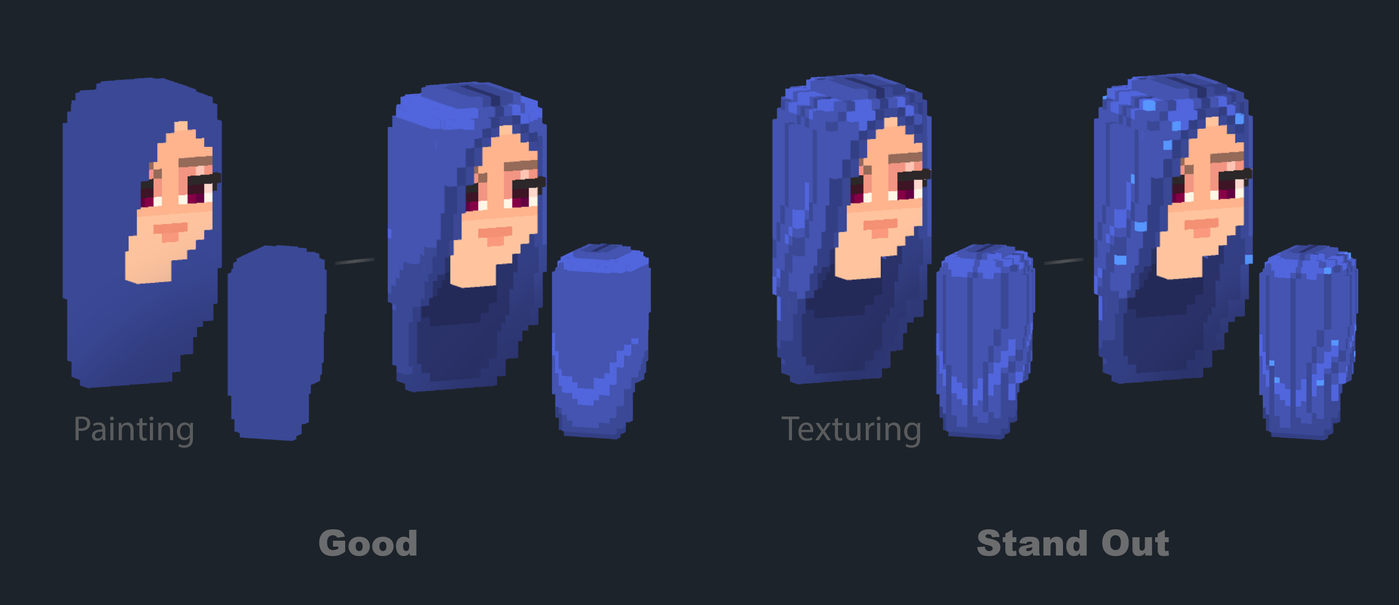
Painting and Texturing
Finally, we come to painting and texturing. I intentionally separate these two concepts to simplify the work: Painting establishes the base tone, highlights, and shadows, while Texturing is the final step that breathes life into the model and makes it feel vibrant.
Painting. I use five tones—rarely more. To start, I paint everything with a mid-tone. Then, I use two lighter tones for the top of the hair to represent the key light and two darker tones for the bottom to represent shadowing. The goal is to create the illusion of volume. Think of it as shading a lit sphere—simple, yet effective.
Texturing. Once the main lighting is done, I start texturing by dividing the hair into strands using darker tones (It might sound funny to talk about "strands" on a voxel model, but this mindset helps you stylize real hair effectively on a voxel object). Sometimes, I also add accents with the darkest tone to add more depth to the texture, making it more interesting and refined. I also use the lightest tone for highlights to add shine to the texture. This isn’t always necessary, but it’s helpful when you want to make the hair appear glossier. Every design has its nuances.
Pro tip: If you’re working on an NPC, your goal is to make the hair look good from the front. If you’re designing a playable character, you should pay extra attention to the back of the head, as that’s what the player will see most of the time. Players look at NPCs from the front, and spend hours staring at the back of their own character.
Nodes and Animation
If you want to fully unleash the creative possibilities of VoxEdit, you can use nodes. Nodes help make a hairstyle unique and memorable—they allow you to create additional geometry at any angle and craft unique animations.
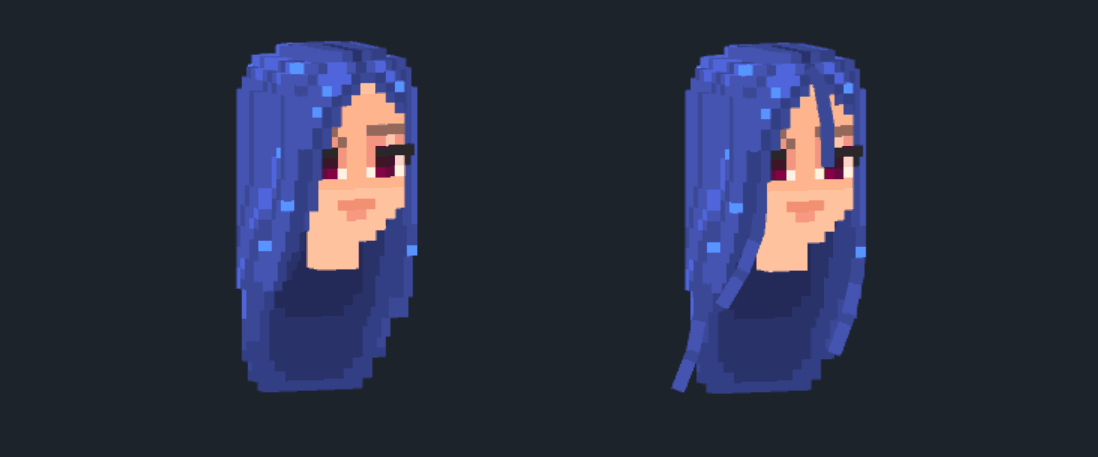
Recently, in the new season, I saw a great example of this, where Adam Sale made real dreadlocks that moved when running and jumping. It looked amazing and made the character really stand out. Just look at these dreadlocks, how they stay in a resting position while moving and how they fall according to physics when the character drops.
See how our blue-haired girl transformed with animated nodes!
That's all Folks!
A huge thank you to everyone who read to the end! I wish you more creativity in your life, keep making your art and sharing it! If you liked it and tried these techniques, please share your results in the comments here in the club or on X, I’d be so happy to see your creativity! Just don’t forget to tag me.
Hooray, I Wrote My First Post! I’d appreciate it if you could help spread this post on X—maybe it’ll inspire someone! See ya!
Amazing article and very beautiful examples! Great design tips sprinkled in on top. Can't wait to see what topic you'll cover next.
Amazing article indeed, Liu!
It has very useful information, thank you for sharing it with us!